
This guide walks through the complete process of setting up secure, certificate-based, server-to-server authentication between Salesforce and MuleSoft (Anypoint Studio) using the OAuth 2.0 JWT Bearer Flow. This method allows an integration user or external system to authenticate with Salesforce using a signed JSON Web Token — no interactive login required.
The setup involves six major stages:
- Creating a self-signed certificate in Salesforce
- Exporting the certificate to a Java KeyStore (.jks) file
- Creating an External Client App (Connected App) in Salesforce
- Enabling the JWT Bearer Flow and uploading the certificate
- Configuring App Policies and OAuth Policies
- Configuring the JWT connection in Anypoint Studio and testing it
Prerequisites: This process is intended for Salesforce Administrators and MuleSoft Integration Developers. You will need System Administrator access in Salesforce and access to Anypoint Studio.
Part 1: Create a Self-Signed Certificate in Salesforce
The certificate is used to digitally sign the JWT (JSON Web Token) that MuleSoft sends to Salesforce for authentication. Salesforce verifies this signature using the same certificate that was uploaded to the External Client App.
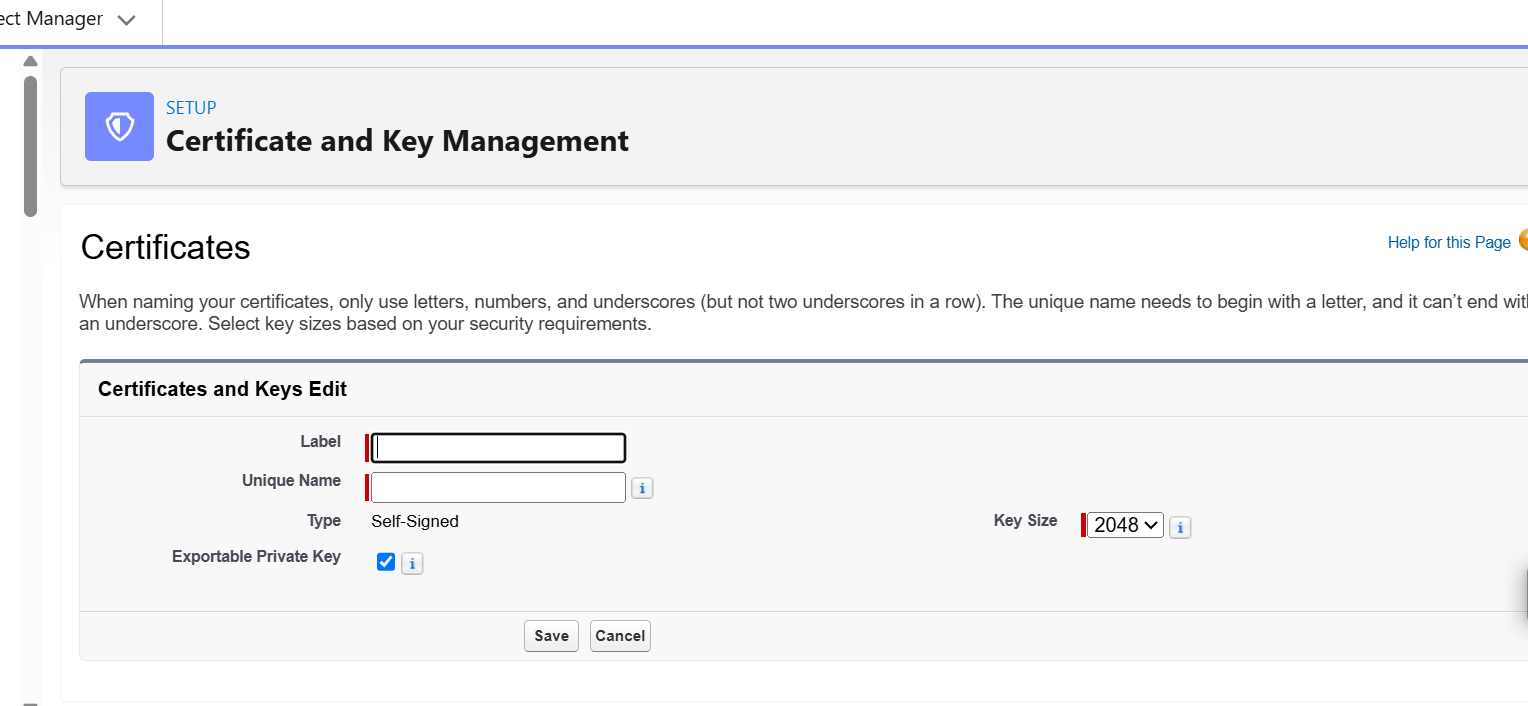
- In Salesforce, go to Setup and search for Certificate and Key Management.
- Click Create Self-Signed Certificate.
- Enter a Label and Unique Name for the certificate (letters, numbers, and underscores only).
- Ensure Exportable Private Key is checked, since the private key will need to be exported into the keystore in the next step.
- Click Save.
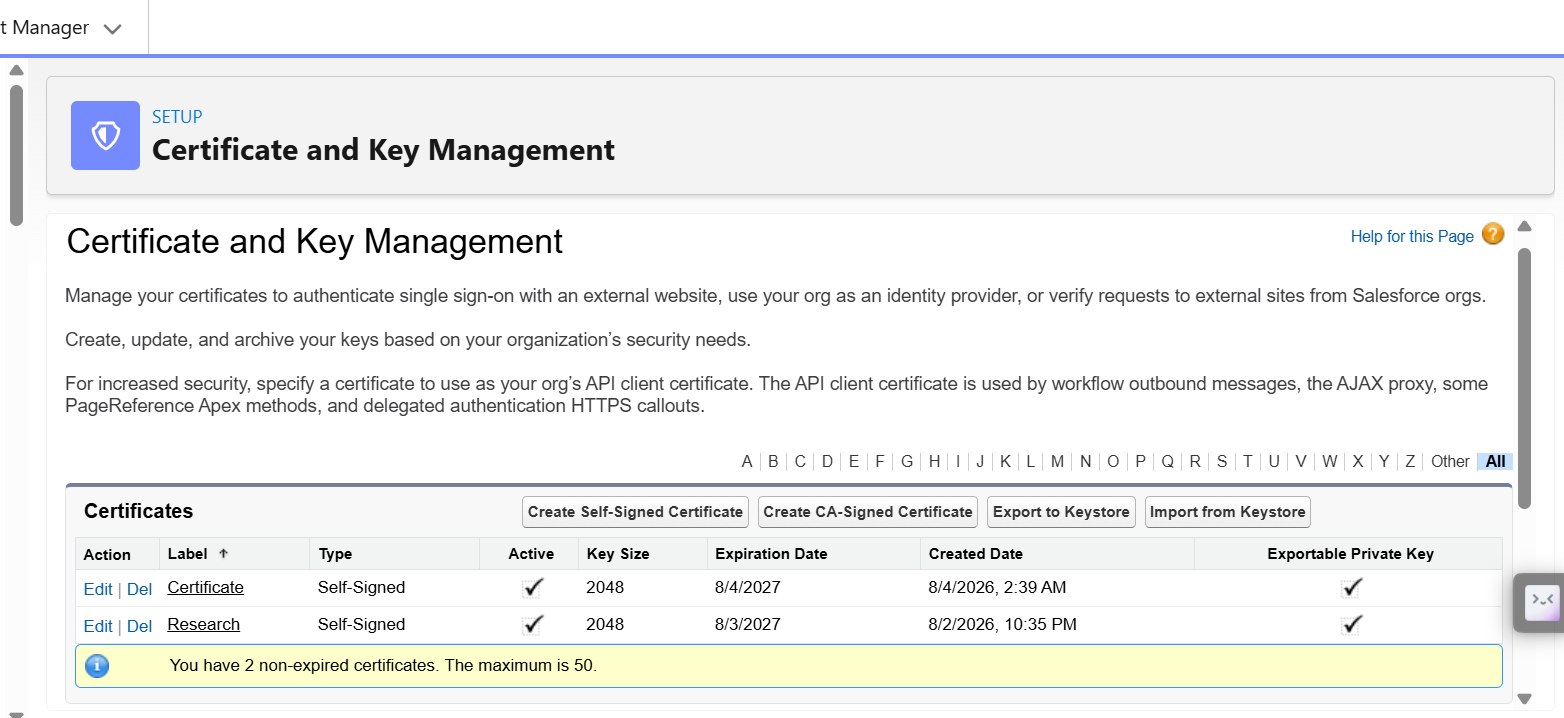
Once saved, the certificate appears in the Certificate and Key Management list along with its expiration date and key size. From this page also download the certificate file (.crt) — it is needed separately for the connected app upload.
Part 2: Export the Certificate to a Keystore (.jks)
MuleSoft's JWT connector requires the private key in Java KeyStore (JKS) format. Salesforce provides a built-in option to export all certificates in the org directly into a .jks file.
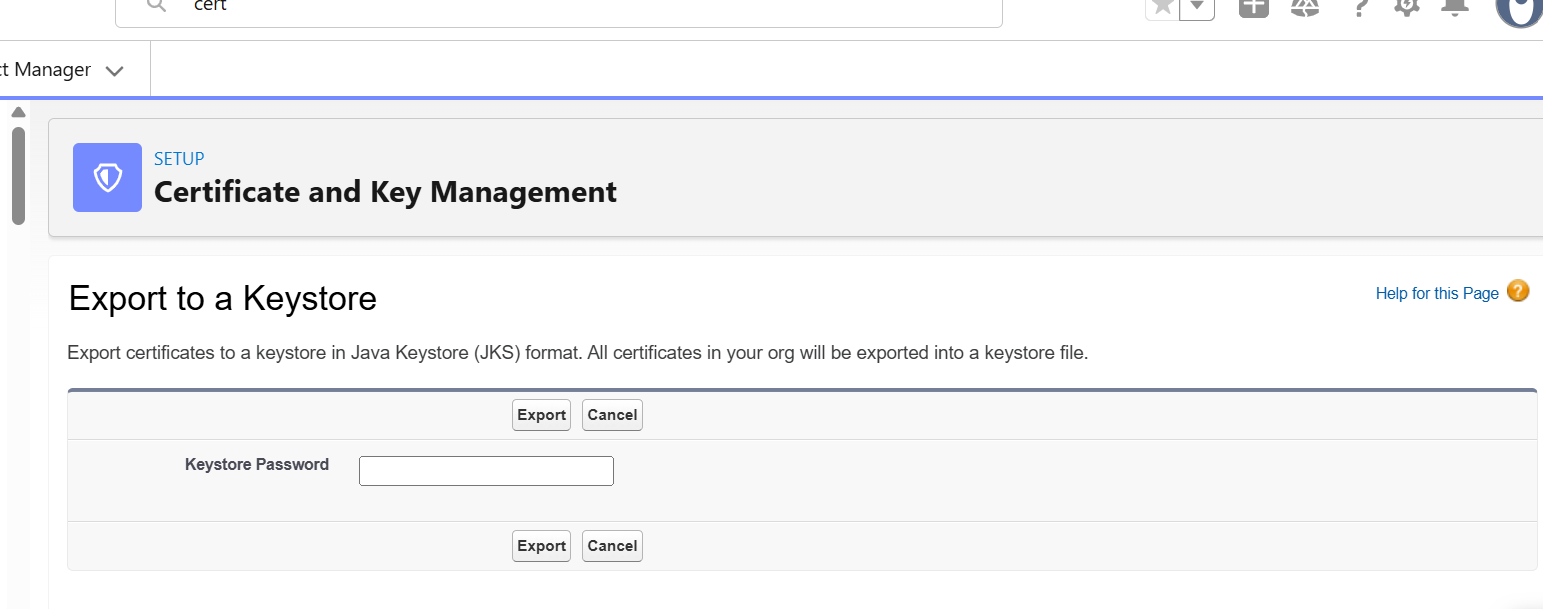
- From the Certificate and Key Management page, click Export to Keystore.
- Enter and confirm a Keystore Password. This password protects the .jks file and will be required again later in Anypoint Studio, so store it securely (e.g., in a password manager or secrets vault).
- Click Export. Salesforce will generate and download a .jks file containing all non-expired certificates in the org.
Checkpoint: At this point you should have two files saved locally: the certificate file (.crt, optional) and the keystore file (.jks). Both are needed for the Anypoint Studio configuration in Part 5.
Part 3: Create an External Client App in Salesforce
The External Client App (the modern equivalent of a Connected App) is what MuleSoft authenticates against. It defines the OAuth scopes, the JWT Bearer Flow, and which certificate Salesforce should trust.
3.1 Navigate to the App Manager
- In Setup, search for App Manager, then open External Client Apps → External Client App Manager.
- Click New External Client App.
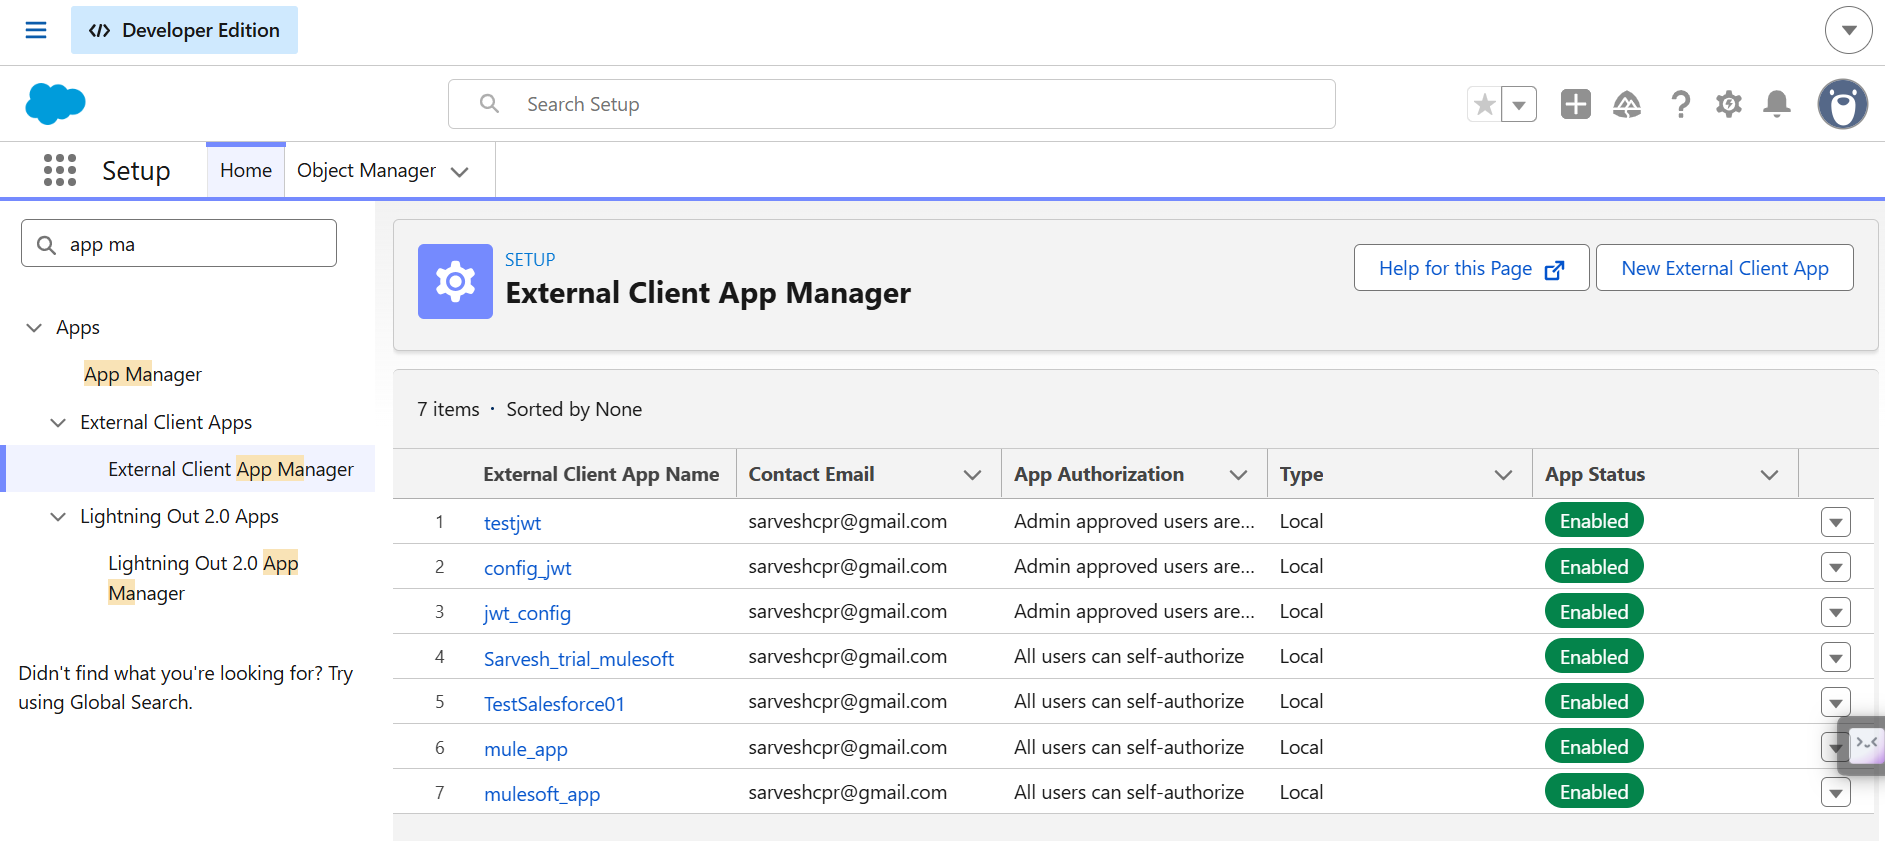
3.2 Fill in Basic Information
Complete the required fields under Basic Information:
| Field | Description |
|---|---|
| External Client App Name | A descriptive name for the app, e.g. MuleSoft_JWT_Integration. |
| API Name | Auto-populated from the app name; can be edited. |
| Contact Email | Email address of the app owner/administrator. |
| Distribution State | Set to Local for internal, org-specific integrations. |
3.3 Enable OAuth Settings
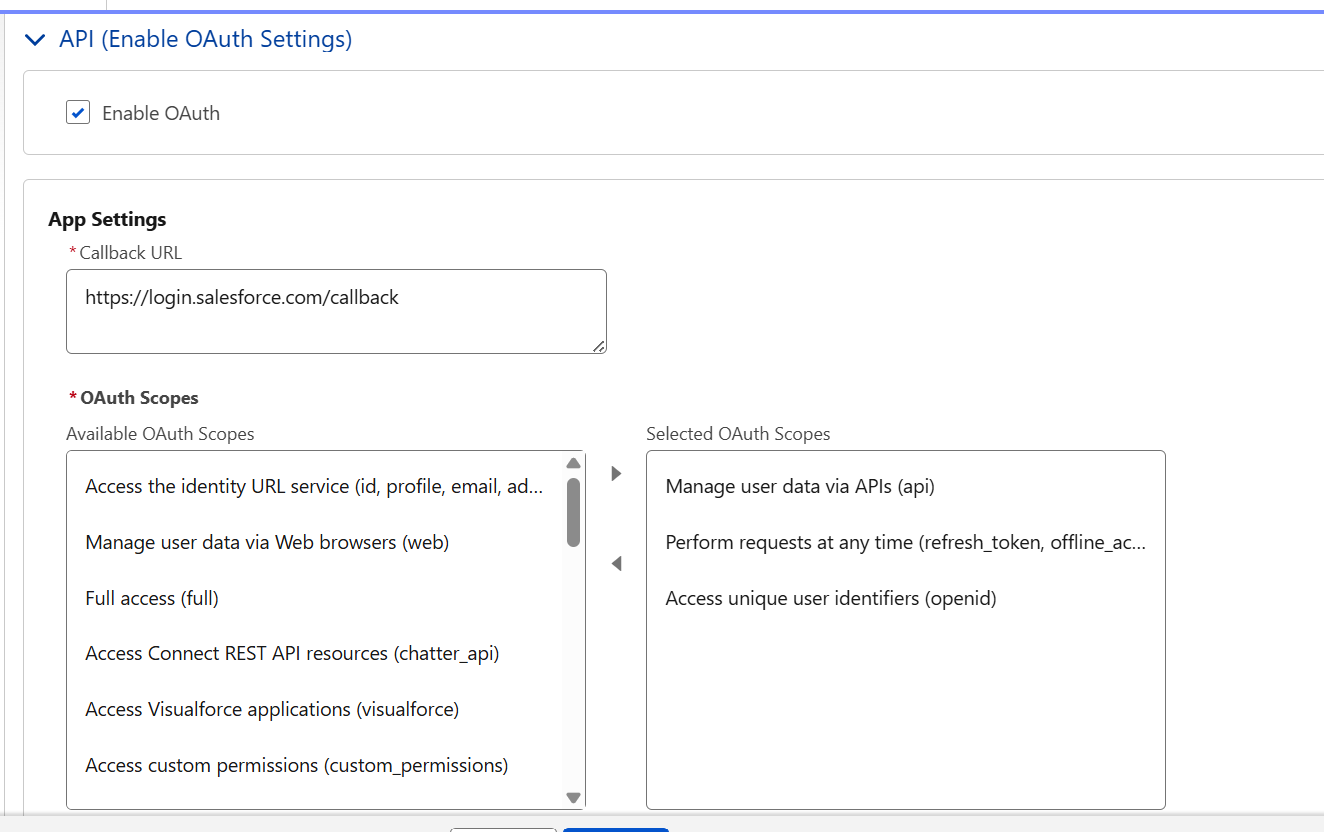
- Expand the API (Enable OAuth Settings) section and enable it.
- Enter a Callback URL (a valid URL is required even though it is not used directly by the JWT Bearer Flow).
- Under OAuth Scopes, move the scopes required by your integration — for example, Manage user data via APIs (api), Perform requests at any time (refresh_token, offline_access) — from Available OAuth Scopes to Selected OAuth Scopes.
3.4 Enable the JWT Bearer Flow and Upload the Certificate
- Scroll to Flow Enablement.
- Check Enable JWT Bearer Flow.
- Under Certificate Upload, click Upload Files and select the certificate (.crt) exported in Part 1.
- Click Create / Save to finish creating the External Client App.
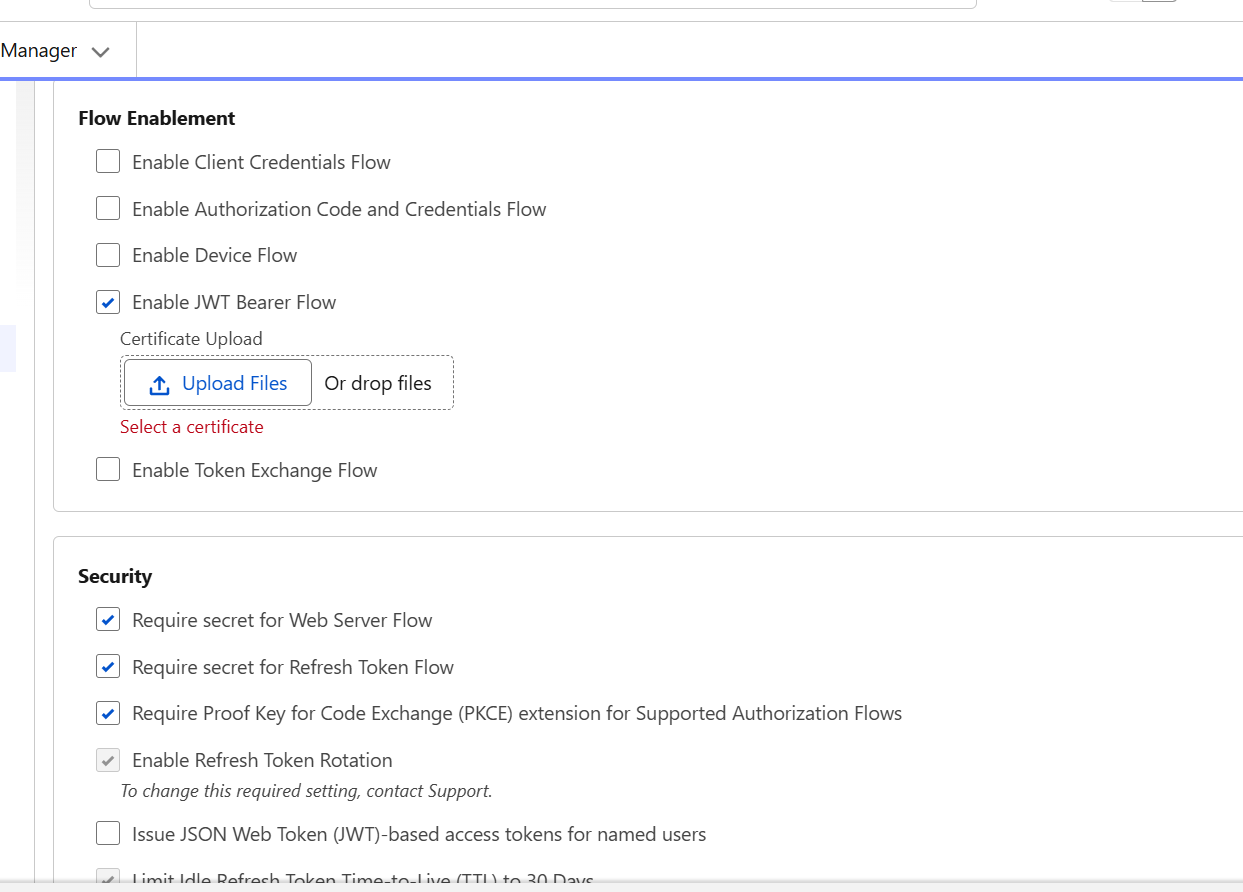
Important: The certificate uploaded here must be the same certificate whose private key was exported into the .jks file in Part 2 — Salesforce uses it to validate the JWT signature sent by MuleSoft.
Part 4: Configure App Policies and OAuth Policies
After the app is created, its policies must be configured so that Salesforce knows which users/profiles the integration can act as, and how strictly to enforce authorization and IP restrictions.
4.1 OAuth Policies — Permitted Users and IP Relaxation
- Open the newly created External Client App and go to its Policies tab.
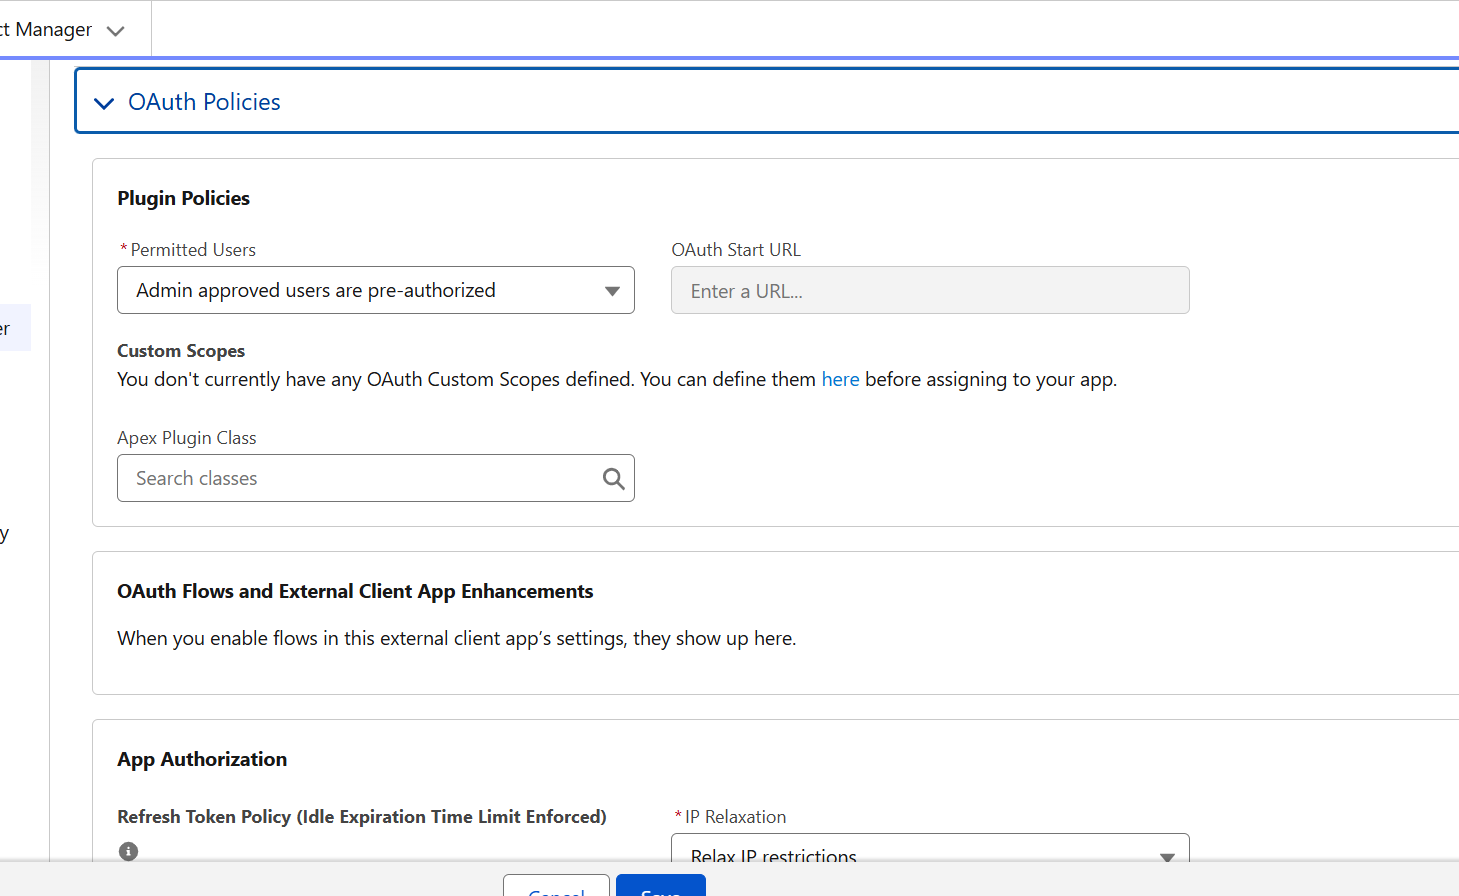
- Expand OAuth Policies.
- Under Plugin Policies, set Permitted Users to Admin approved users are pre-authorized.
- Under App Authorization, set IP Relaxation to Relax IP restrictions.
- Click Save.
4.2 App Policies — Profiles and Permission Sets
- Under Select Profiles, move System Administrator (or the appropriate integration profile) to Selected Profiles.
- Under Select Permission Sets, move SCRT2 Integration User to Selected Permission Sets.
- Click Save.
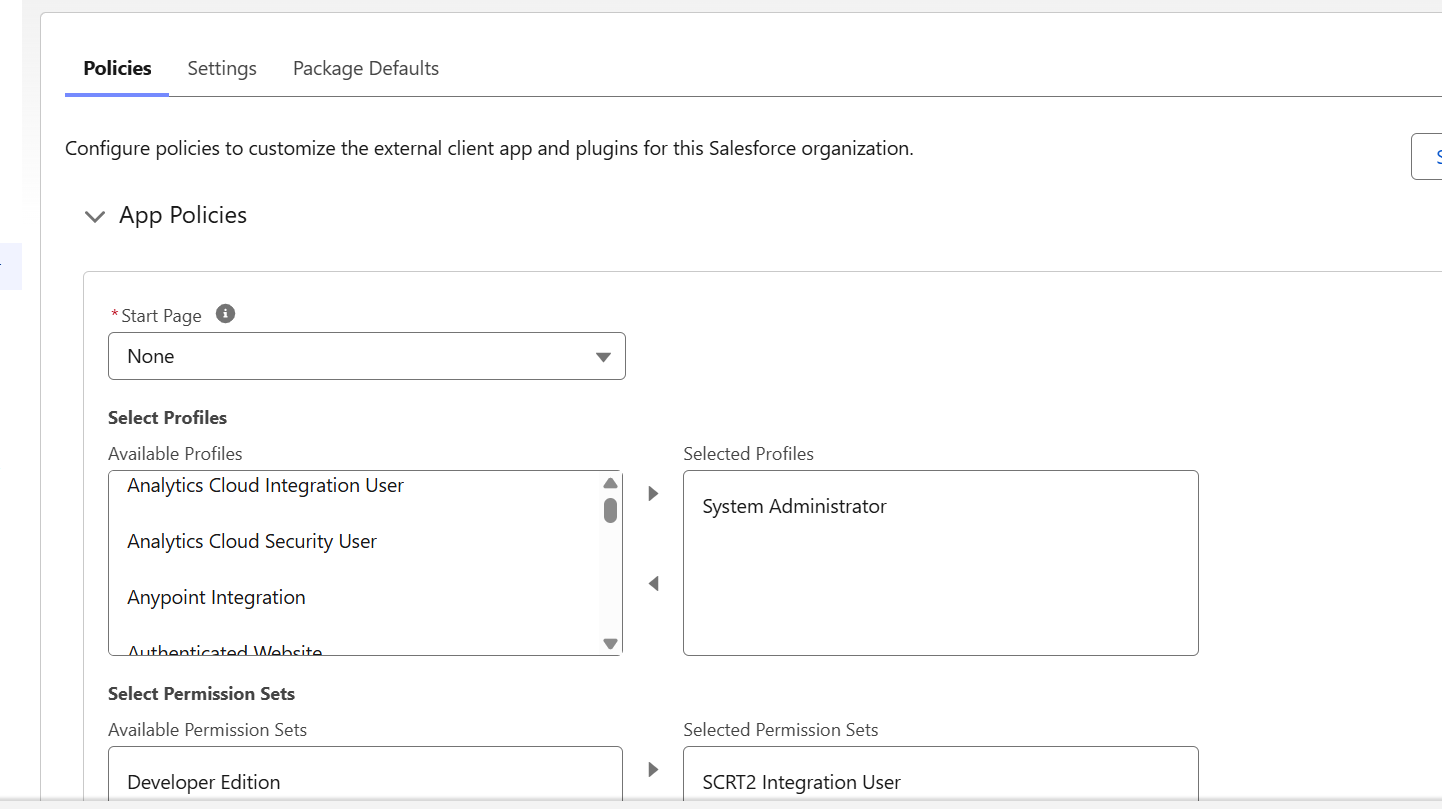
Wait Time: After saving these policies, wait 3–5 minutes for the changes to propagate through Salesforce before attempting to authenticate from Anypoint Studio.
Part 5: Configure the JWT Connection in Anypoint Studio
With the External Client App created and its certificate uploaded, the final step is to configure the Salesforce connector in Anypoint Studio to authenticate using the OAuth JWT Bearer Flow.
In your Salesforce connector configuration, select OAuth JWT Bearer Flow and provide the following values:
| Parameter | Where to find it / What to enter |
|---|---|
| Consumer Key | Copy from the External Client App's settings page (under API / Enable OAuth Settings). |
| Keystore | Path to the .jks file downloaded in Part 2. |
| Store Password | The keystore password you set when exporting to the keystore in Part 2. |
| Certificate Alias | The name (label) of the certificate created in Part 1. |
| Principal | The Salesforce username the integration will run as (e.g. the System Administrator user). |
| Token Endpoint | https://login.salesforce.com/services/oauth2/token (use test.salesforce.com for sandboxes). |
| Audience URL | https://login.salesforce.com (use https://test.salesforce.com for sandboxes). |
Once all fields are filled in, click Test Connection to verify the setup.
Part 6: Test the Connection
- In Anypoint Studio, open the Salesforce connector configuration created above.
- Click Test Connection.
- A success message confirms that Salesforce accepted the signed JWT and issued an access token — the integration is now ready to use.
Troubleshooting: If the test fails, double-check that:
- The certificate uploaded to the External Client App matches the alias/keystore used in Anypoint Studio.
- The Principal user has the SCRT2 Integration User permission set and System Administrator profile assigned in App Policies.
- You waited at least 3–5 minutes after saving App Policies before testing.
Summary
By completing the steps above, Salesforce and MuleSoft now trust each other through a certificate-based OAuth JWT Bearer Flow. Salesforce holds the public certificate on the External Client App, and MuleSoft signs authentication requests using the matching private key stored in the .jks keystore. This setup is headless, token-based, and does not require user interaction after the initial configuration — making it ideal for automated, server-to-server integrations.
Quick reference — end-to-end flow:
- Create self-signed certificate → Certificate and Key Management
- Export to Keystore → download .jks
- Create External Client App → Basic Info → Enable OAuth Settings → Flow Enablement (upload certificate)
- App Policies → assign Profile + Permission Set
- OAuth Policies → Admin approved users pre-authorized + Relax IP restrictions
- Wait 3–5 minutes
- Anypoint Studio → configure JWT connector (Consumer Key, Keystore, Password, Alias, Principal, Token Endpoint, Audience URL)
- Test Connection